Your Guide to Irresistible Dulce de Leche from Sweetened Condensed Milk
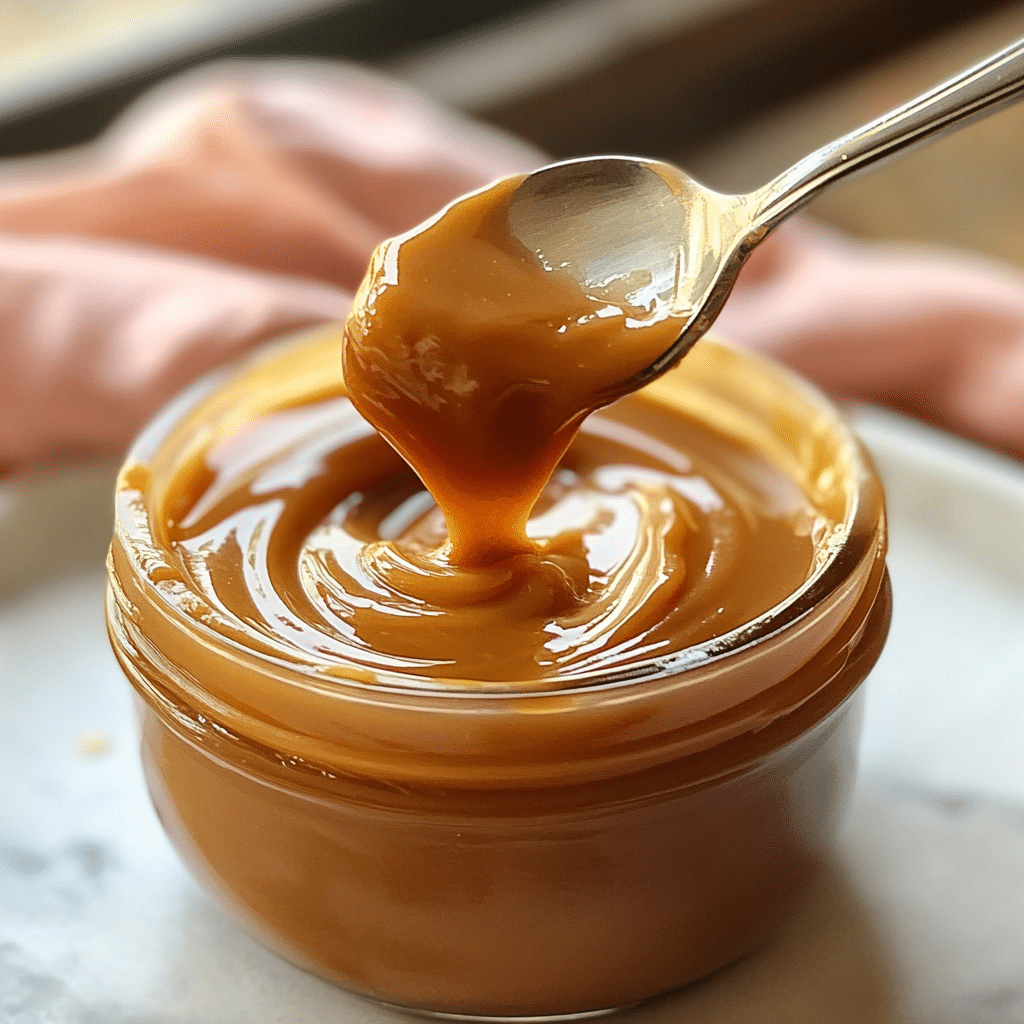
Imagine a rich, golden, velvety smooth caramel-like delight that elevates any dessert to a masterpiece. That’s the magic of Dulce de Leche, and what if we told you that creating this irresistible treat at home is surprisingly simple? Forget complicated sugar work and precise temperature readings; with just one humble can of sweetened condensed milk, you can unlock the secret to easy homemade dulce de leche right on your stovetop. This guide will walk you through the process, ensuring you can whip up a batch of this luscious spread that will have everyone asking for more.
The sweet aroma wafting from your kitchen will soon remind you why homemade treats are always the best. This method transforms a simple can into a decadent, deeply flavored sauce perfect for drizzling, dipping, or simply enjoying by the spoonful. It’s a testament to how minimal ingredients and a little patience can yield extraordinary results. Ready to indulge your sweet tooth and impress your friends and family? Let's dive in and create this unforgettable confection together!
Why Embrace Easy Homemade Dulce de Leche?
While buying pre-made dulce de leche is always an option, there's an unparalleled satisfaction and superior flavor that comes from making it yourself. The easy homemade dulce de leche method using sweetened condensed milk offers several compelling reasons to make it your next kitchen project:
- Irresistible Flavor: This method yields a deeply caramelized flavor with notes of toasted sugar, creamy butterscotch, and a hint of a nutty finish. It’s far richer and more nuanced than many store-bought versions, adding a touch of pure luxury to any dish.
- Remarkable Simplicity: The beauty of this recipe lies in its minimalist approach. Requiring just one main ingredient – sweetened condensed milk – and water, it’s an ideal choice for both novice cooks looking for a rewarding challenge and experienced bakers seeking a fuss-free indulgence. No fancy equipment or intricate techniques required!
- Unmatched Versatility: Once you taste this golden goodness, you’ll find countless ways to enjoy it. Drizzle it over pancakes, waffles, or French toast for a decadent breakfast. Use it as a filling for cakes, tarts, or cookies. Swirl it into coffee or hot chocolate. Or, our personal favorite, simply enjoy it straight from the jar with a spoon. Its thick, spreadable consistency makes it perfect for almost anything.
- Effortless Make-Ahead Convenience: Dulce de leche is a fantastic make-ahead item. Prepare a batch in advance, store it in an airtight container in the refrigerator, and it will keep beautifully for up to two weeks, sometimes even longer. This makes it ideal for busy cooks who want to have a versatile, delicious treat on hand for impromptu desserts or last-minute entertaining.
- Guaranteed Crowd Pleaser: Everyone loves a good caramel, and this homemade version is guaranteed to impress. Its rich flavor and silky texture make it an instant hit at gatherings, potlucks, or simply as a special treat for your loved ones.
The Simple Magic: What You'll Need
The beauty of making easy homemade dulce de leche using this method is the incredibly short ingredient list. You likely already have everything you need!
- Sweetened Condensed Milk: This is the undeniable star of our show. It's crucial to use sweetened condensed milk and not to confuse it with evaporated milk. Sweetened condensed milk is milk that has had most of its water removed and sugar added, making it thick and sweet – the perfect foundation for our caramel transformation. Check the label carefully to ensure you have the right product.
- Water: Essential for submerging the can during cooking. This creates a gentle, consistent heat environment that safely caramelizes the milk inside.
Optional Ingredients for Flavor Variations:
While the classic version is utterly delicious on its own, you can elevate your homemade dulce de leche with a few simple additions:
- Pinch of Salt: A tiny pinch of sea salt can beautifully balance the sweetness, enhancing the complex caramel flavors. Add it to the finished dulce de leche.
- Vanilla Extract: A teaspoon of good quality vanilla extract stirred into the finished product adds a warm, aromatic depth that complements the caramel notes perfectly.
- A Touch of Baking Soda (Advanced Tip): For an even richer, slightly thicker, and deeper colored dulce de leche, some chefs recommend stirring 1/4 teaspoon of baking soda into the sweetened condensed milk *before* you seal the can (if using a different cooking method like oven or slow cooker) or even into the milk if making from scratch. For the can method, this isn't applicable inside the can, but it's a useful tip for other methods.
- Spices: Consider infusing your dulce de leche with a cinnamon stick, a few cardamom pods, or a star anise during the simmering process (if using the traditional open-pot method, not sealed can) or simply by stirring in powdered spices to the finished product.
Master the Stovetop Method: Step-by-Step Guide for Easy Homemade Dulce de Leche
Making easy homemade dulce de leche via the stovetop method is straightforward, but it requires adherence to safety guidelines and a little patience. Follow these steps for a perfect batch every time:
- Prepare the Can: Begin by thoroughly removing the paper label from your can of sweetened condensed milk. If the label proves stubborn, a quick soak in warm water for a few moments will usually loosen the adhesive, allowing it to peel off easily. Removing the label prevents paper bits from floating in your water bath and ensures even heating.
- Set Up the Pan: Select a large, deep saucepan or stockpot. Carefully place the label-free can (or cans, if making multiple batches) into the pot. Now, fill the pan with water, ensuring that the can is fully submerged by at least 3 inches of water. This generous water level is critical for two reasons: it maintains a consistent temperature around the can for even cooking, and most importantly, it prevents the can from boiling dry, which could lead to overheating and potential explosion – a crucial safety consideration.
- Bring to a Boil, Then Simmer: Place your saucepan on the stovetop over high heat. Bring the water to a rapid, rolling boil. Once it has reached a vigorous boil, immediately reduce the heat to a gentle simmer. The water should maintain a consistent, gentle bubble, but not a furious boil. This controlled simmering is key to the slow, even caramelization of the milk inside the can.
- Simmer and Monitor (The Patience Part!): Allow the can to simmer uncovered for approximately 3 to 3.5 hours. The exact time can vary slightly depending on your desired thickness and depth of caramelization. For a lighter, softer dulce de leche, aim for 2.5-3 hours. For a darker, thicker, and more intensely flavored spread, go for the full 3.5 hours. Crucially, you must monitor the water level every 20-30 minutes. As water evaporates, add more hot water (from a kettle or another pot) to the saucepan to ensure the can remains fully submerged by at least 3 inches at all times. *Never let the water level drop below the top of the can.*
- Cool and Enjoy: After the simmering time has passed, carefully use sturdy tongs to remove the hot can from the water. Place the can on a wire rack to cool completely to room temperature. This can take several hours. It is absolutely vital to allow the can to cool completely before attempting to open it. Opening a hot can of pressure-cooked sweetened condensed milk can be extremely dangerous due to the built-up pressure inside, potentially causing severe burns from hot caramel. Once fully cooled, open the can with a can opener, stir the rich dulce de leche to achieve a smooth consistency, and transfer it to an airtight jar or container.
Safety Warning: Please read and adhere to all safety instructions. Never open a hot can of sweetened condensed milk that has been cooked this way. Always ensure the can remains fully submerged in water throughout the entire cooking process. If the water level drops too low, add hot water immediately.
Tips for Perfection and Creative Uses
Now that you've mastered making easy homemade dulce de leche, let's explore how to perfect it and put it to good use!
Troubleshooting Your Dulce de Leche
- Too Thin? If after cooling and stirring, your dulce de leche is thinner than you'd like, don't worry! You can gently heat it in a saucepan over low heat, stirring constantly, to further reduce and thicken it. Be careful not to scorch it.
- Too Thick? If it's too thick or stiff, especially after refrigeration, you can thin it out by gently warming it or stirring in a tiny amount of milk (regular or condensed) until it reaches your desired consistency.
- Lumpy? Small lumps can sometimes form. A quick whisk or even a run through a fine-mesh sieve will usually smooth it out perfectly.
Storing Your Homemade Dulce de Leche
Once cooled and transferred to an airtight container, your homemade dulce de leche will last wonderfully in the refrigerator for up to 2 weeks. For longer storage, it can often be frozen for up to 3 months, though its texture might change slightly upon thawing. Always ensure it's in a well-sealed container to prevent freezer burn or odor absorption.
Creative Serving Suggestions & Flavor Infusions
The versatility of dulce de leche is truly astounding. Here are some ideas to inspire you:
- Breakfast Bliss: Drizzle generously over pancakes, waffles, French toast, or oatmeal.
- Decadent Desserts: Use as a filling for cakes, cupcakes, tarts, and cookies. Swirl it into cheesecakes or brownies. Top ice cream, yogurt, or fruit salads.
- Beverage Booster: Stir a spoonful into your coffee, hot chocolate, or even a milkshake for a rich caramel kick.
- Simple Snacks: Spread it on toast, crackers, or use it as a dip for apple slices or pretzels.
- Pies & Pastries: It makes an incredible base for pecan pie, banoffee pie, or as a layer in trifles.
- Flavor Infusions: Experiment by stirring in a pinch of espresso powder, a dash of orange zest, or a hint of cayenne pepper for a unique spicy-sweet kick after it's cooked.
Conclusion
There's something incredibly satisfying about transforming a simple can of sweetened condensed milk into a luxurious, golden dulce de leche. This easy homemade dulce de leche method not only delivers an incomparably rich and creamy flavor but also offers a rewarding kitchen experience with minimal fuss. From its humble ingredients to its endless culinary applications, this caramel-like delight is truly a kitchen marvel. So, gather your can, find your deepest pot, and prepare to embark on a sweet adventure that will yield an irresistible treat you'll be proud to share – or secretly hoard all to yourself. Happy cooking!
